DSAR-Portal Login Language
DSAR-Portal Login Languages
The Portal Login Languages feature allows users to switch the language of the DSAR (Data Subject Access Request) portal login interface, making it easier for individuals to navigate and understand the content in their preferred language. This is especially helpful when users want to check the status of their submitted requests. By enabling multilingual support, the portal ensures that users from different linguistic backgrounds can access and interpret their request information without confusion or the need for external translation tools.
This feature adds significant value by enhancing user experience and accessibility. It provides additional feasibility for users to interact with the portal confidently, reducing the chances of misinterpretation or missed updates.
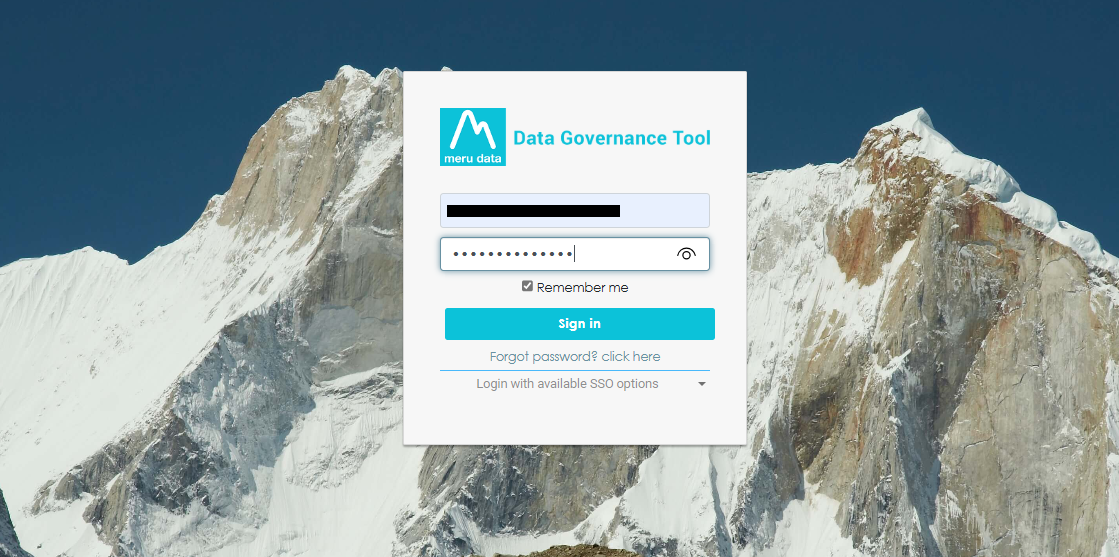
Sign In
- Log in to your Data Governance Tool account.
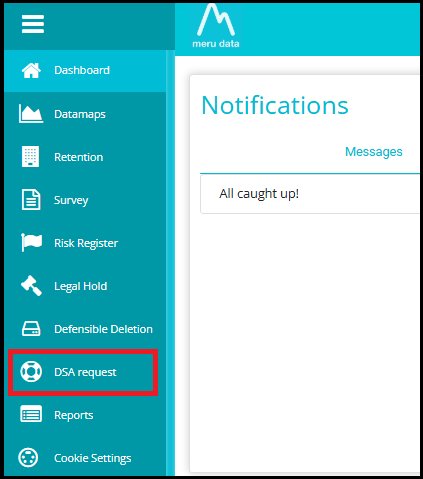
Open the DSAR Module
Click on the hamburger menu
 to open the navigation panel.
Select DSA requests from the menu.
View Configuration
- In the DSA Request Module, turn on the toggle to "View Configuration" option.
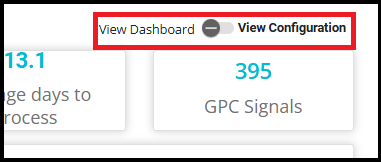
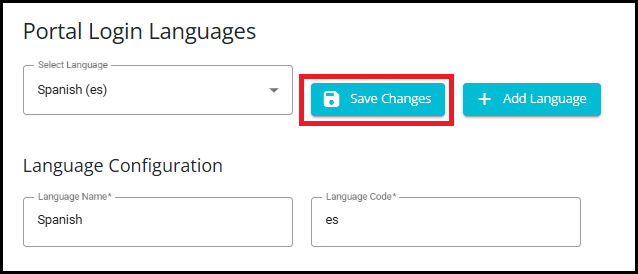
- Navigate to the "Portal Login Languages" Tab on the View Configuration page.

Select or Add a Language
To view an Existing Language:
- The language list will only display languages that the user has previously created.
NOTE: If no languages have been created yet, the list will be empty. In this case, we need to configure a language from scratch.
Select the existing language from the list (If any).
This will not activate the language on the portal, but it will allow you to view and edit the translated field names for that language.
You don't need to re-enter all the other information. If there are any changes to the existing details, make the necessary updates.
After making the necessary updates, save the changes to keep the translation accurate and complete.
To Add a New Language:
- Click the "Add Language" button.
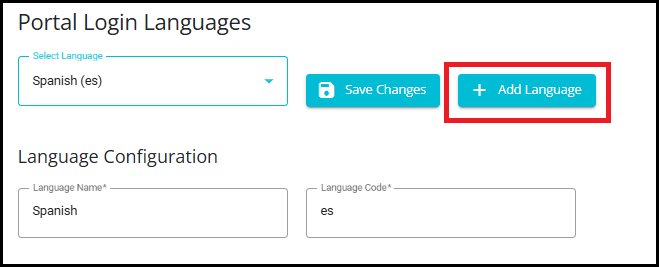
Fill in the following required fields:
Language Name (e.g., French)
Language Code (e.g., fr)
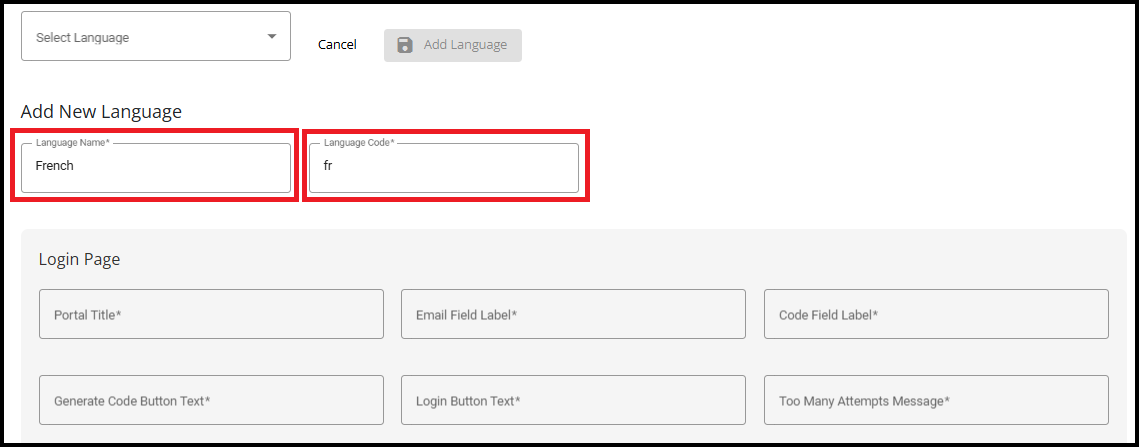
Use a translator to fill all remaining fields in the selected language.
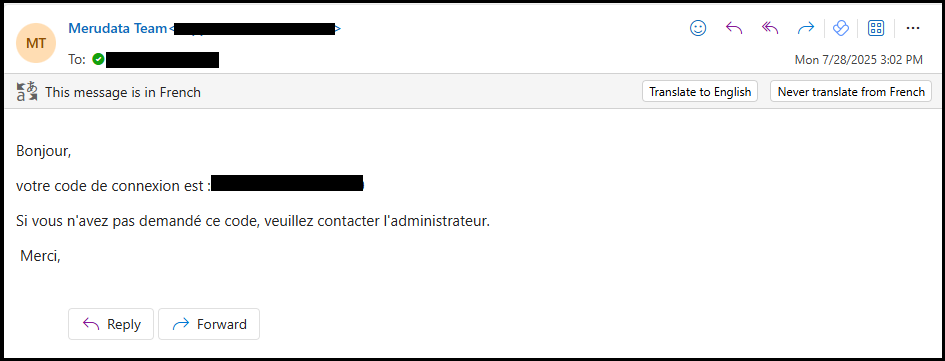
Select the appropriate language specific Generate code email template from the drop down. (e.g., privacy-portal-login-fr).
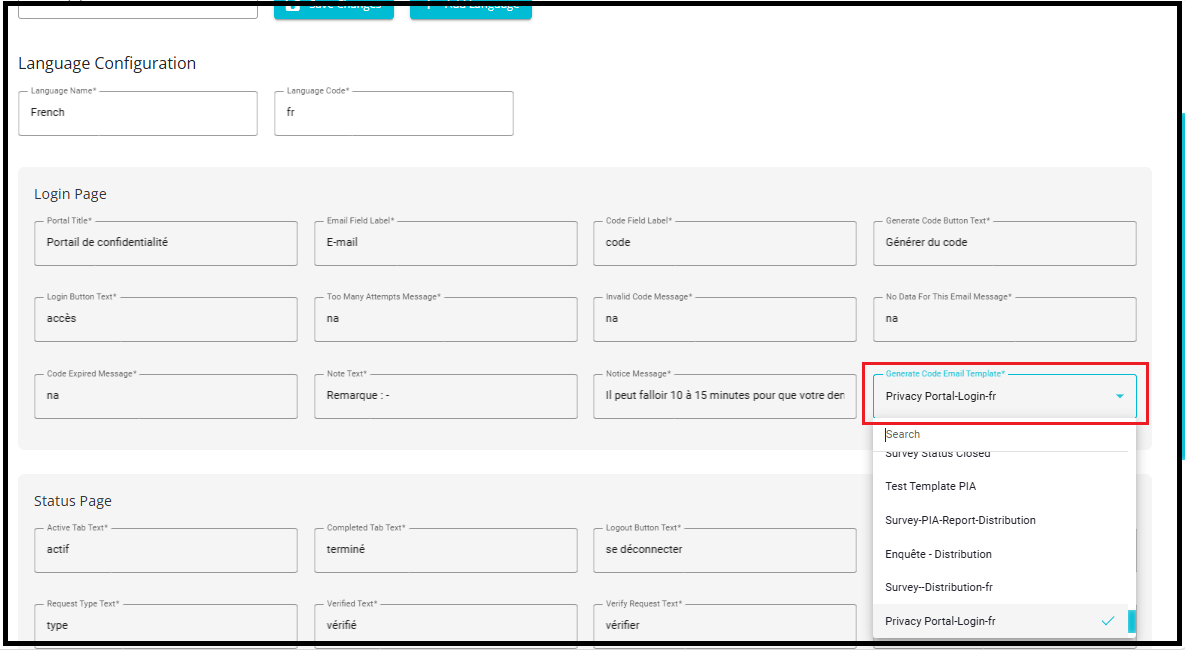
- Once selected, the system will send an email to retrieve the login code in the chosen language.
NOTE: If a user wishes to create a new email template, they need to configure the email settings and create the template accordingly. For detailed steps, refer to the documentation titled "How to Configure Email Templates| Meru Data"
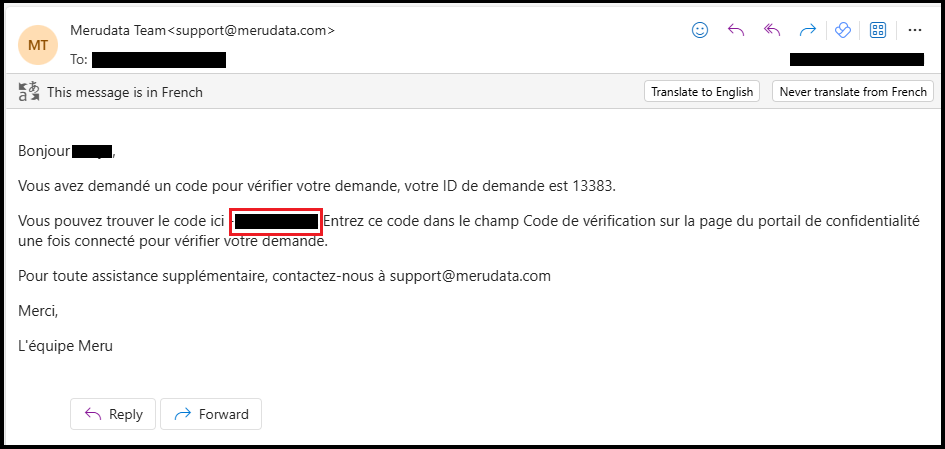
- Similarly, choose the corresponding Request Verification Email Template (e.g., privacy-portal-request-verification-fr) to send the verification email in the same language.
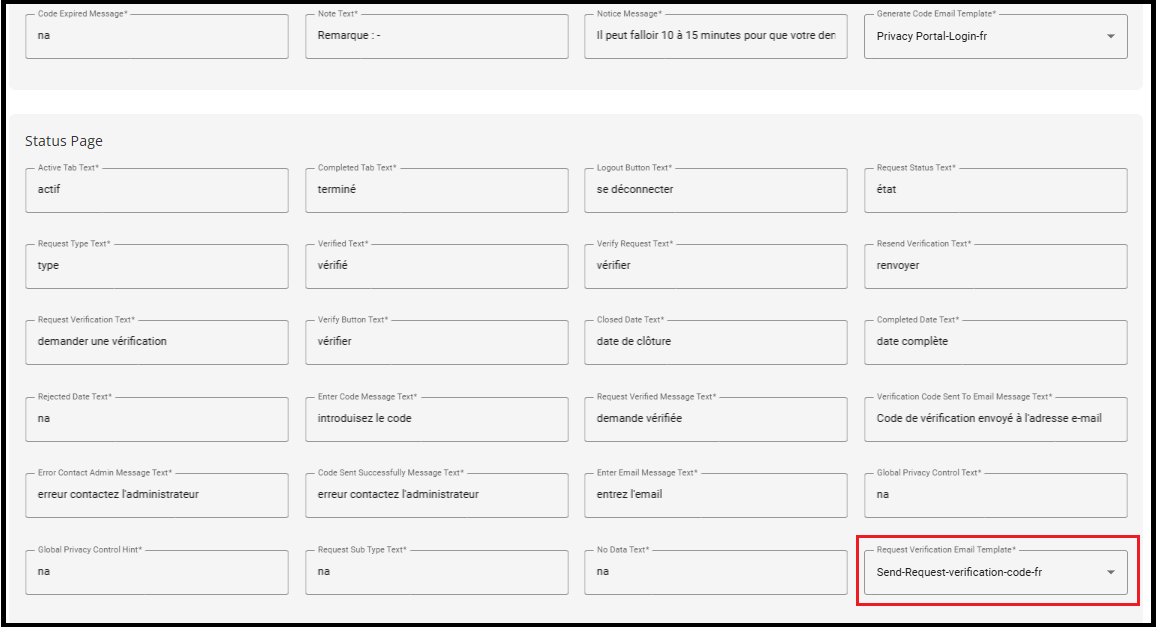
- A Request Verification Email Template is required when a user submits a request that remains unverified. After logging into the portal, the user will see an option labeled "Verify Request".

- Upon clicking this option, a verification code is generated, and this email template will be used to deliver the verification code to the user.
Note: Every field must be filled in. If even one field is left blank, the language cannot be added.

- After completing all fields, click "Add Language" to save the new language.

Verify Language on Privacy Portal
Open the Privacy Portal link in your browser.
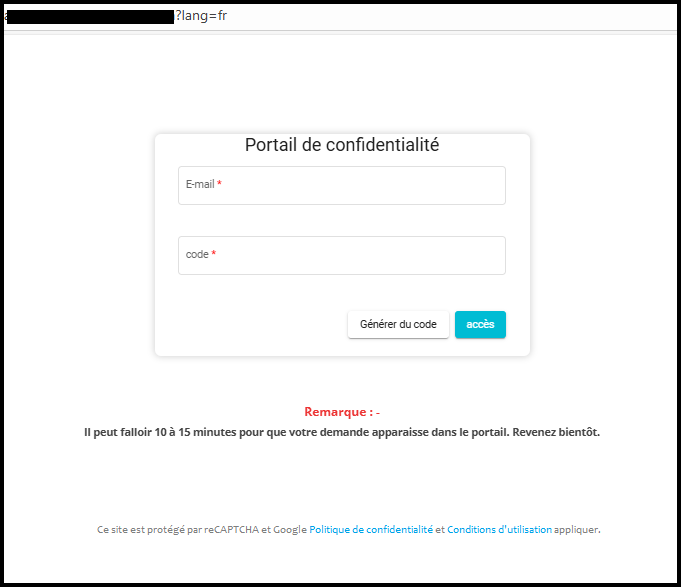
You can directly access the Privacy Portal login page by appending the language parameter to the base login URL.
Format: <Privacy_Portal_Base_URL>login?lang=<language_code>
Steps to Open the Privacy Portal Link:
We have placed the Portal Login link in the footer of the page.Steps may vary depending on the location of the link (header or footer). Below are the steps followed for the footer placement:
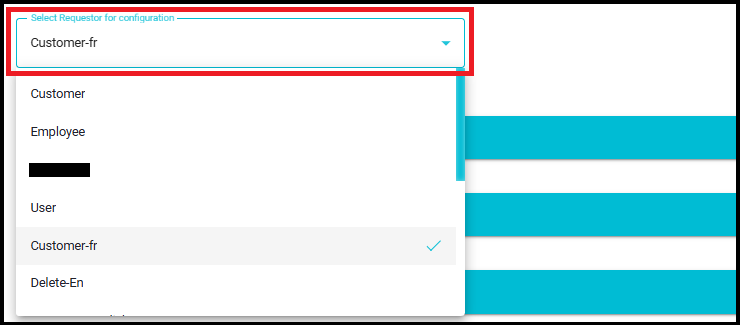
- Navigate to the "Domains" tab.

Select the specific Requestor
For example: customer-fr.
- Click on "Footer Configuration" under the Privacy Portal Layout Configuration section.
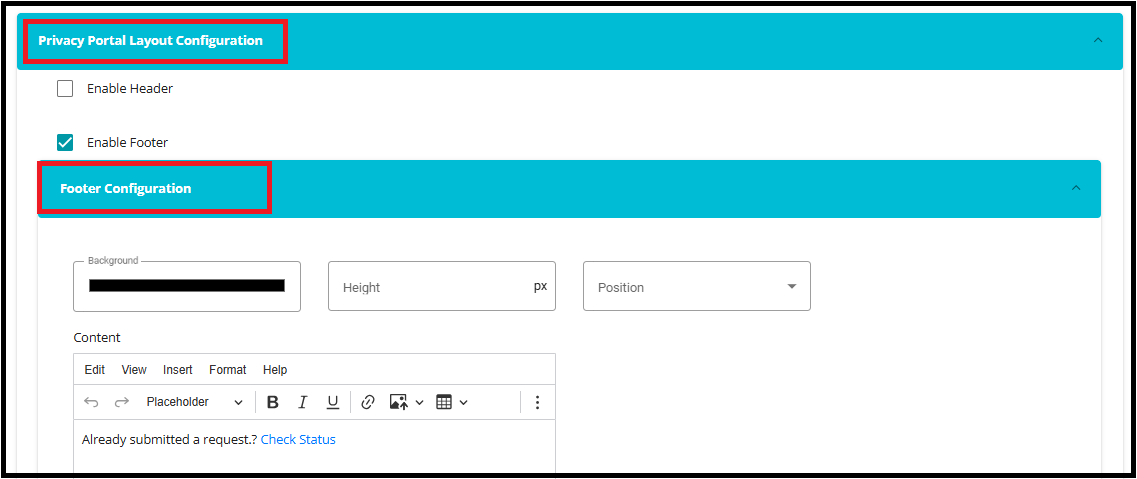
- Click on the text "Check Status"- This text is the display name considered here for the Privacy Portal login link.
- Click on Link - You will be navigated directly to the Privacy Portal login page.
- If the Portal Login link is placed in the header, follow these steps to open privacy portal login page
- Click on Privacy Portal Title Configuration section.

- click on the text "Privacy Portal"- This text is the display name considered here for the Privacy Portal login link.

To View in Another Language:
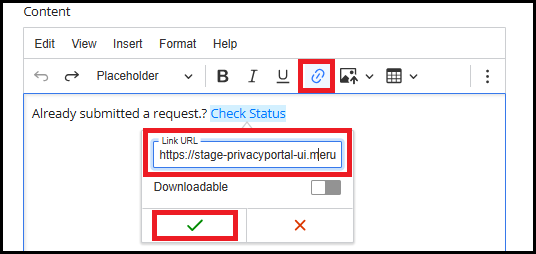
- Edit the Link to Change Language
- If the link is placed in the footer, click on "Check Status" to edit it.
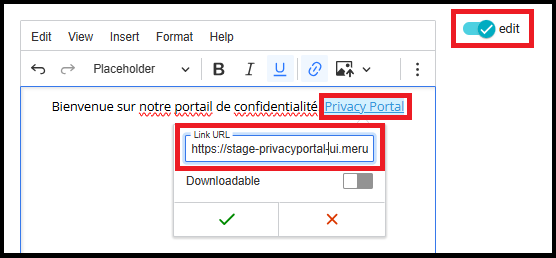
- If the link is placed in the header, first enable the "Edit" toggle, then click on "Privacy Portal" to make the necessary changes.
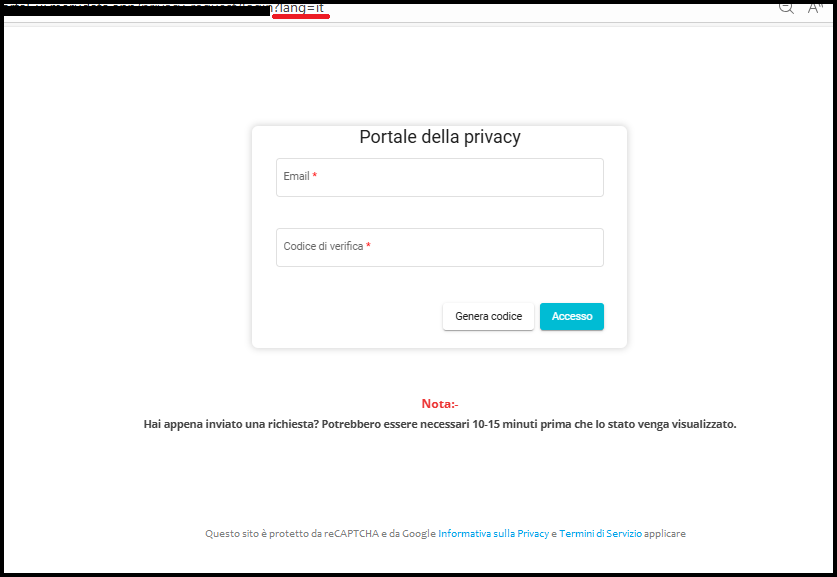
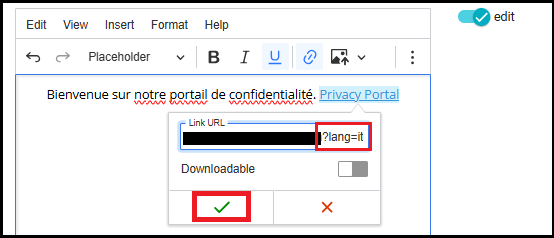
- In the URL, locate the language parameter (e.g., "?lang=fr") change it to another language code, such as "?lang=it" for Italian and click on save.
Note: The language code used while configuring the translation in Portal Login Languages must exactly match the language query parameter used in the Check Status / Privacy Portal login link.
For example, if the language code added during translation is "it", the portal login URL must include "?lang=it". Any mismatch between the configured language code and the URL parameter will prevent the portal from loading in the selected language.
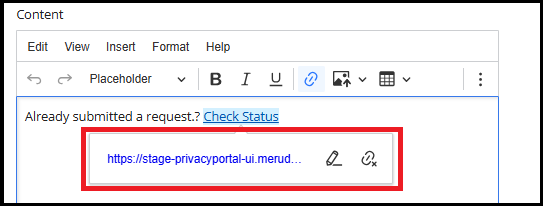
- After editing, click "Privacy Portal" and click on the link to open it.
This will open the Privacy Portal form in the selected language.